Everything I know about Zwift Virtual Cycling Game, Cycleops PowerBeam Pro and PowerTap C1 Chainrings
When I started cycling, one product that caught my eye was the Cycleops PowerBeam Pro stationary indoor trainer. I thought it was cool to have the metric of power without having the expense and complications of having the meter and computer on the bike either from a wheel, crank, pedals, or whatever. It can just get really messy if you use a dedicated wheel for racing as I do or if you have two bikes. Consequently, using a trainer (or spin bike) with a power meter gives the added benefit of an ERG mode (more about that below) when doing virtual cycling.
I was able to get a great deal on a PowerBeam Pro ANT+ (PBP) kit that included everything I needed to get online with the trainer: heart rate strap, ANT+ dongle, Joule GPS computer, steel skewer, and cadence sensor. I already owned a wheel I use for training, a trainer tire, USB extension cable, bike training mat, and climbing block (though a thick book works equally well to raise the front wheel). With my Mac OS I’ve had absolutely no issues with the PBP or Zwift (virtual cycling game). It’s a very polished system that works exactly as I’d hoped.
A few details on the setup: looking at my bike mounted on the trainer it appeared to be a bit crooked. I put my bubble level on the axle of the trainer and it wasn’t quite level. I raised the adjustable leg of the PBP by about 1 cm and everything is square now. I plugged my ANT+ dongle into a spare USB extension cable (A-Male to A-Female) I’d had in my cord bag and wired it under my computer desk and taped it out of site on the underside of the desk nearest to my bike. It’s about eight feet from the electronics in the PBP and I get a perfect signal. It’s in the line of sight of the trainer which helps. That said, I don’t have a cordless phone or anything running in the room other than my inexpensive wifi router (TP-Link TL-WR841N). I have a computer with an adjustable height so I lower the monitor when I’m biking (tri bike) for neck comfort. It makes me cringe to see how high people mount their monitors in their setups (neck crank anyone?).
After everything was running it was time to simply calibrate the PBP using the Joule computer rolldown method per the instructions. PBP firmware can be updated by hooking the Joule up to your Mac/PC with a micro USB cable (this is also how to charge the battery) and then using the “configure device” option through the free PowerAgent software app you’ll need to download on your computer.

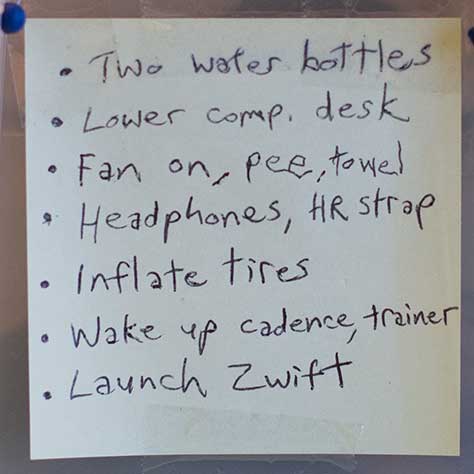
My Zwift pre-flight checklist on a Sticky note sits in my pain cave.
Zwift is an incredibly well-designed app that utilizes the power numbers from a bike trainer and basically translates them to your avatar onscreen. The harder you pedal, the faster you go in the game. They have a free 14 day trial and it is wise to get in on that to make sure all your hardware is supported and functional before paying for the no-contract monthly subscription. When I got onto Zwift, my first order of business was an FTP test. I hadn’t biked since my last triathlon several months ago and had never trained with a power meter. The app has a dedicated FTP test and it was very easy to follow the steps to get an accurate reading. First a warmup with a few efforts followed by a 20 minute block as hard as you can ride. Zwift has a fantastic user interface (UI) which is easy to read and navigate. My FTP reading came back at 206w, so that was the key metric for all my training with the power meter. I must admit the app makes the test (and power metrics in general) really, really simple.
To date, there are two modes in Zwift: workout mode (structured) and ride mode which includes racing or just cruising around the course/s at your own pace. Whichever mode you choose, the virtual courses are visually identical and both have hills.
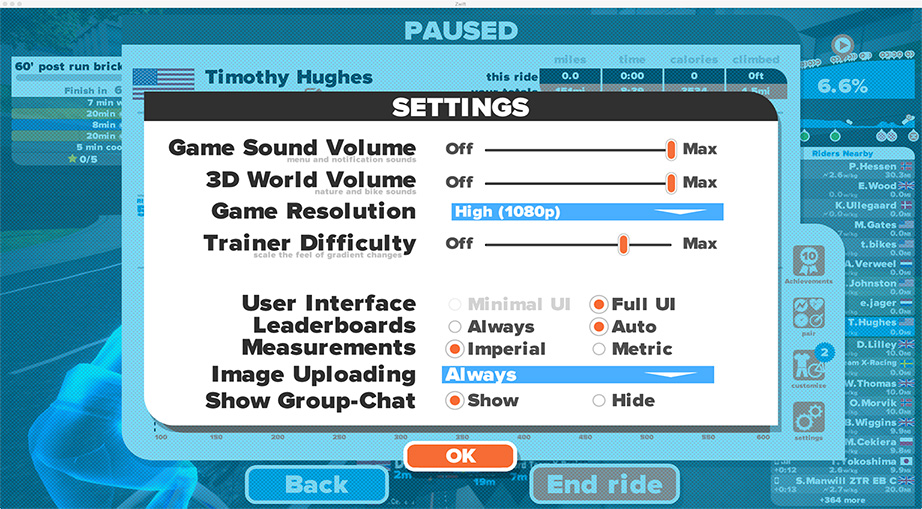
What is ERG mode? Smart trainers have a feature called ERG mode in which the computer (head unit or software) controls the amount of resistance sent to the trainer. During the 20 minute interval of an FTP test, Zwift turns ERG mode off in order to get an accurate result. Zwift has an adjustable setting called ‘Trainer Difficulty’ which makes hills feel like hills when in ride mode. It obviously does this by sending more resistance to the trainer when you’re riding up an incline (so you’ll need to shift your bikes gears as you ride the various gradients).

The Zwift settings menu. When a smart trainer is attached, you’ll see the trainer difficulty slider.
In workout mode, the workouts automatically specify how much power to do during each interval and will send the trainer that amount of power. For example, if the workout you’re doing has you pushing a 200w interval, Zwift will automatically send 200w of resistance to the trainer regardless of your cadence and the gear ratio you’re in. Consequently, if you’re a spinning at a steady cadence of 100rpm in fifth gear, Zwift will essentially put 200w to the trainer so you can hit your numbers. If your legs and butt need a break and you pedal out of the saddle at 60rpm Zwift will compensate the power to the trainer within a few seconds to keep you at 200w. In workout mode, hills on the course have no effect over your power, but your avatar will “slow down” in terms of speed on inclines. That’s a smart feature, because if you’re doing a rest interval at 110w and you come to a 12% graded hill (that takes over 200w to climb)-that would not jibe. To put it another way, the workout intervals dictate the needed power rather than the elevation of the course.
ERG mode is awesome and I keep it on almost all the time. However, there are a few exceptions when I’ll turn it off. Anytime I may need to sprint I think ERG mode tends to slow the startup of your sprint down. So if my training plan (in workout mode) calls for sprints in a workout I’ll turn ERG mode off. During that workout I’ll have to actually shift my bike gears to hit my power numbers. But when it comes time to sprint-I can hit it hard without having to wait for the trainer to “catch up” with my effort. I haven’t done any racing yet in Zwift, but I have heard people turn the trainer difficulty down (or turn ERG mode off) before a race so they can breakaway before the finish line.
Mike Henasey has a nice list of all the workouts and training plans on his blog at: Zwift Workout lists for those that are interested. There are some very nice plans ranging from time trial specific workouts to a Century (100 mile) training plan and my personal favorite, the 12-week FTP builder. There are custom workouts as well where you can build your own intervals or recreate a Zwift workout from your existing training plan like I’ve done in the graphic below.

Custom workouts are easy to design in Zwift. Here’s a 60′ workout with 15 hard intervals.
My original plan was to just get in cycling shape with using the PBP trainer but to race and train outdoors without a power meter (PM). Well, once I got hooked into the numbers I realized I was going to have to buy a dedicated PM as well. There are loads of options at this point with the cheapest and lightest probably being the Stages single leg PM. My preference was to buy a slightly more accurate (it gives both legs power vs. just one) and expensive crank/chainring based unit, the PowerTap C1. It is a brilliant piece of kit quite new to the marketplace which broadcasts in Bluetooth and ANT+. I’d need a new crankset to accommodate the C1 so I got a nice deal on a Shimano 105 (5750) semi-compact (52/36) crankset. In addition to being a better gear ratio than my existing kit, they were 7.5mm shorter than my stock crankarms. At 5’8″, this is a far better fit for me on the tri bike and I’m very happy with the change so far.
I won’t go into all the details of installing the new cranks, bottom bracket, and chainrings, but it was quite easy for me to do myself after I did the research and bought the correct tool. Once everything was installed it took a few rides for the power meter to give me an accurate reading. That’s a known characteristic of the C1 chainrings and not a big deal at all. Now my PBP and the C1 give power numbers within about 10w of each other. The C1 has a cadence sensor built in (cool!) and I’ve found that is accurate within 1rpm of my dedicated cadence sensor. To keep things clean and simple, I’ll remove the dedicated cadence sensor before my races. “Calibrating” the C1 is done at the factory, but end-users should perform a “manual offset” on a regular basis and that is accomplished with the free PowerTap app on iOS with Bluetooth. I’m unaware of any other platforms to perform the manual offset on the C1. The iOS app is also an easy way to update the C1 firmware and check the level of the [user replaceable] battery. So far I absolutely love the C1 and Joule head unit. That said, I haven’t tried it outside yet, so that will be a big factor.

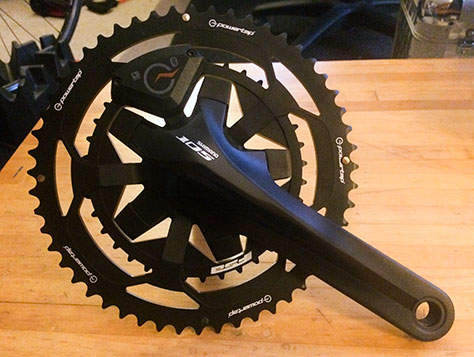
The C1 chainring mounts to your crankarms with just a T30 (Torx) wrench (not to be confused with a torque wrench).
I use the PBP to pair with Zwift rather than my C1. As I mentioned, the numbers are close between the two. Additionally, ERG mode is only supported when using the trainer. In other words, you can’t use a separate PM to control the ERG mode of your trainer so it makes sense to have an accurate PM on your smart trainer.
Setting up the Joule GPS was a bit of a learning experience. In all honesty, the user experience is a bit clunky. Some settings can be changed via a computer with PowerAgent software while others like the custom dashboards seemingly can only be set with the head unit. That said, it’s an extremely high-tech device in a small, lightweight, waterproof unit and once everything is set up it seems to be low maintenance. I think I’ve got everything set the way I want it, but I’ll need to do some outdoor testing when it warms up to fine tune and test everything. For the time being, I have power smoothing on the Joule set to a 5 second average because anything below that seems to be too jumpy for my taste. I certainly don’t think I’m going to blow my bike split pacing in one of my races in sub 5 seconds so it seems completely acceptable to me to use that setting.
I use two apps to view my power files: Strava and GoldenCheetah. Both are useful, but strava is much easier to use. For now, I’m a strava premium member but I’m not sure how long I’ll stick with that. Rather than overanalyzing data, I think my time is best spent working out, getting an accurate FTP number, and following a good training plan to raise that number along with my endurance.
For further information on Zwift I recommend the Zwift How To Video playlist on youtube, Zwift Riders facebook group, and the Titanium Geek Unofficial Guide to Zwift.

3 Comments
Art G
I purchased a PowerTap C1. It lasted 1 month, then stopped working. I tried different batteries and different head units. It just kept dropping signal to 0.
Sent back to Saris/PowerTap three weeks ago under warranty. Still waiting for response. Poor service. I hope that your C1 and your trainer both last. The Powerbeam Pro’s appear to have a good reputation for reliability. C1’s not so much. A lot of scary stories out there.
That being said, I noticed that the Powerbeam Pro specs top out at 1000 watts and only (only?) 10% slope.
How does your powerbeam pro perform whenever you hit the 11-16% grades on Zwift? Does it strain and get hotter? Does the resistance fall off? Does your Zwift rider just lose ground on other riders at those points on the course? Do the stars fall out of or into alignment or anything like that?
Nice article.
Thanks for the info.
Timothy Hughes
I’m not a guy that cranks out 1000w so that’s not been an issue. I run Zwift in training mode and rarely do free rides. If I have an interval of say 215w near the end of my workout and I can’t hold the power and my cadence slips to 50rpm or less the tire starts ‘slipping’ on the trainer. That’s really the only issue I’ve had.
Art G
That’s good news. Sounds like a really solid trainer. I think the new magnus trainer has better numbers on paper, but is in fact an overall lower quality product than the powerbeam.